
How to mail merge in Outlook
This article describes how to use the Outlook internal e-mail merge mechanism in order to create and send mass personalized emails. Although mail merge in Outlook 2013 is pretty limited, it still can be a viable solution for some of us.
E-mail merge using the Outlook built-in merge engine
As you might know, Outlook benefits from the MS Word document mail merge capabilities, allowing you to apply mail merge in Outlook emails. Basically, you can import Outlook Contacts and personalize mass emails (mail merge), so you can email a newsletter to many recipients, as separate emails.
Assuming you already have an Outlook Contacts list and you want to send a mass email to your mailing list, here are the steps required to do a mail merge in Outlook:
1. from your main Outlook window, go to the People tab and select the desired contacts that you want to include in your Outlook mail merge:
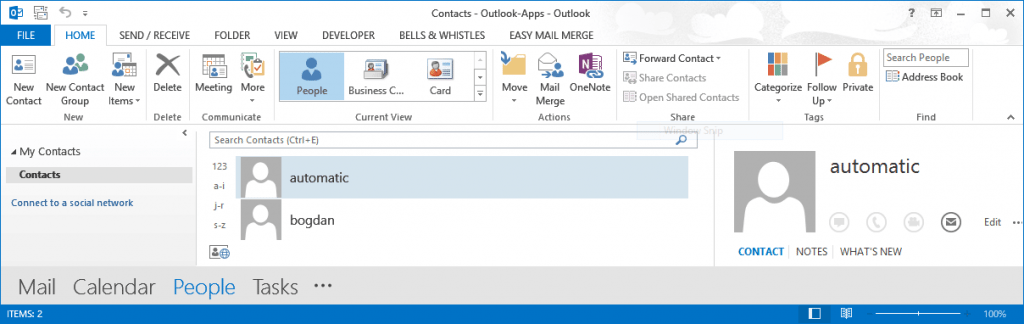
2. once you selected your contacts, click on the Mail Merge button displayed on the main Outlook People menu, in the Actions area:

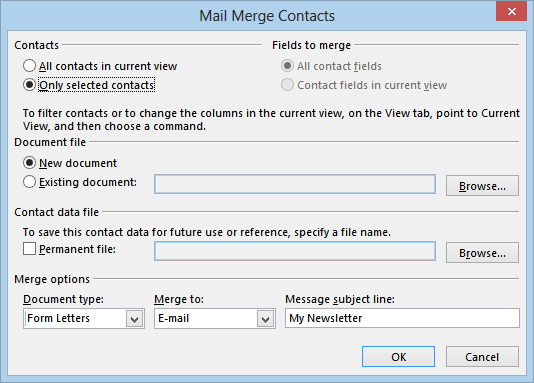
3. on the mail merge options pop-up window, make sure you select “Merge to: e-mail” (and type a subject for the newly created mass email):
4. Outlook will open a new Word document window, where you can type and personalize your email content. As a side note, please pay attention to the use of the words “mail” and “e-mail” in Word. By “mail”, Word actually refers to the physical mail (you know, the one delivered by your mail man, in an envelope). Since Word can perform both mail merge (printing mass mails & envelopes) and e-mail merge (composing & sending mass emails), make sure you don’t confuse the terms, on the Word interface menus. It may sound trivial, but many get confused by the use of both terms in the same window, especially since more and more people refer to “e-mail” as “mail”.
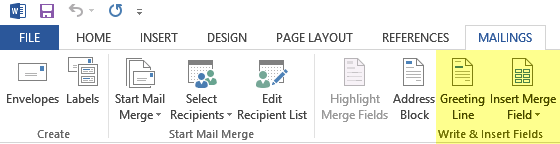
Word lets you personalize the email content by inserting merge fields that were imported from your Contacts. For example, you can personalize the greetings line of your email and make it include the actual name of each contact. However, you can not personalize the email subject line. To personalize the content, click on the “Greeting Line” or “Insert Mail Merge” buttons (depending on what you want to achieve):
5. Once you are done composing your email, you can preview it and you can start the actual merge process by clicking on the Start Mail Merge button -> E-mail Messages:
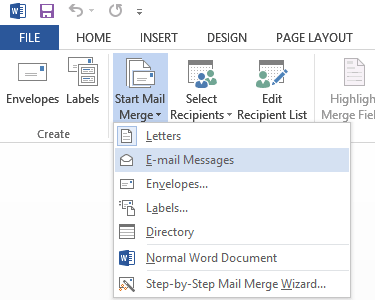
Word will now generate separate, personalized outgoing emails for each imported Outlook Contact.
Mail Merge in Outlook – drawbacks
Since the emails are composed using MS Word, please be aware that (if you are designing a fancy email with images and formatted text) the email content will likely contain design attributes that are not going to be displayed correctly on other email client applications. So it is important to always send a test mail merge message to your own email addresses, before sending the mass email to your contacts.
Also, Word is not capable to schedule the mail merge emails in Outlook, so Outlook will be instructed to send ALL your mass emails at once. If you are about to send lots of emails, you are likely to receive at least a temporary email account suspension from your mail server provider. Even sending as few as a hundred emails can get your account suspended. So always check with your mail server provider, before sending mass emails.
If you want to learn more about bypassing the Outlook mail merge limitations, please see our comparison chart between the Outlook mail merge system and Easy Mail Merge for Outlook.
In our view, Easy Mail Merge provides the best mail merge experience that you can get in Outlook.


[…] 2. Use the Contacts Group as an Outlook mail merge source. Although the Outlook internal mail merge system is pretty complicated, it’s a decent solution to generate and send individual emails to your email group. Here is a detailed tutorial on Outlook mail merge. […]